Friday, June 28, 2013

How to set up OBIEE Access through Smart View

I recently installed the new OBIEE 11.1.1.7 via the simple install option. This is the slim-down, easy to get up-to-speed route which really turned out to be pretty much straight forward. As opposed to the Enterprise installation option, this should only be used for prototyping and is not intended for use in an environment that's actively accessed by users, whether in DEV or PROD. It installs the basic components that are needed to play around with OBIEE's components and even installs Essbase and the various Essbase tools. I'm not going through the install, this has been documented very well in other blogs, e.g. here

Everything was pretty smooth until I got to trying out the SmartView integration with OBIEE. I came across a situation that noone had experienced out there, or at least blogged about. The desciption is: open up SmartView and Create a Private connection, then select the OBIEE Provider.


Unfortunately, all I saw was what you can see below: the Oracle BI EE provider was missing:


Something was off. So I tried out a bunch of this, like using the Smart View HTTP Provider and entering the url for the OBIEE provider, but this didn't work. I was sure that all needed services were installed, though, because I was able to access the url for the OBIEE provider without an error.


Since the private connection didn't work, I tried out a Shared Connection without success. I followed the step in the Smart View User Guide for version 11.1.2.2.310 and saw the option about Accessing Shared Connections from an XML File. I followed the steps explained in there, used forward slashes instead of backslashes etc., but it did not work - because my SmartView version wasn't up to speed.

As soon as I had upgraded Smart View to version 11.1.2.2.310, everything was working fine. Both the OBIEE Provider was available as well as the setup via the local XML file for the Shared Connections worked. I really like the Shared Connection option which I was able to implement using the following SmartViewProviders.xml file which contains providers for Essbase, Financial Reports and OBIEE:

<?xml version="1.0" encoding="UTF-8"?>
<res_GetProvisionedDataSources>
<Product id="APS" name="APS-11.1.2" displayVersion="11.1.2.2.200">
<Server name="Oracle Hyperion Provider Services" 
                   context="http://localhost:7001/workspace/SmartViewProviders"> 
                </Server>
</Product>
<Product id="RAFramework" name="RAFramework-11.1.2" 
           displayVersion="11.1.2.2.000">
<Server name="Reporting and Analysis Framework" 
                   context="http://localhost:7001/raframework/browse/listXML">
                </Server>
</Product>
<Product providerType="ExtensionProvider" name="OBI EE-11.1.1.7" 
           displayVersion="11.1.1.7">
<Server name="Oracle BI, Fusion Edition" 
                   context="OBI:http://localhost:7001/analytics/jbips">
                </Server>
</Product>
<sso></sso>
</res_GetProvisionedDataSources>

After referencing this file as my Shared Connections URL


I can now see the following drop-down list of available Shared Connections in the Smart View panel:


After selecting Oracle BI, Fusion Edition, I am able to select the content that I'm interested in from the BI Presentation Catalog.


If you run into the same issue as I did, just upgrade Smart View to 11.1.2.2.310. Enjoy the new OBIEE Integration with SmartView.


Thursday, May 24, 2012

Oracle Data Integrator 11.1.1.6 - Hyperion Planning IKM bug

There seems to be a bug in ODI 11.1.1.6 when using IKM SQL to Hyperion Planning. This post explains the bug and how it can be resolved. We can also learn that Hyperion is still an important topic for the ODI development team at Oracle ;-)

While preparing the ODI lab for KScope12, I came across an issue with the Hyperion Planning IKM. I implemented an interface which loads metadata from a database table to a Planning application. So, as always, I dragged & dropped my source and target DataStores into my interface, mapped the source columns to the target columns and then went on to selecting the KMs on the Flow tab. Those of you familiar with ODI and the Hyperion KMs know that it's important to set the "Staging Area Different From Target" option on the Definition tab. If this option has not be set, the IKM SQL to Hyperion Planning does not appear in the IKM dropdown.


However, in ODI 11.1.1.6 even after setting the Staging area to either the Memory Engine or a custom staging area, I am not able to select the Planning IKM. I haven't seen this in previous versions, so this seems to be new to 11.1.1.6.


I was wondering if this behavior is the same with other KMs which require a Staging Area different from the Target, so I built a quick interface to write data from the database table to a flat file, using IKM SQL to File Append. This was working fine, though, and I was able to select the IKM from the dropdown list. This confirmed that it must be something specific to the Planning IKM (and potentially also to others, but we will discuss this in a moment). If I'm not able to select the Planning IKM although everything has been set up as needed, there must have been a reason why it was not selectable.

The mechanisms which define the KMs which ODI offers in the dropdown are tied to the technologies of the Interface's Source, Staging Area and Target. So I checked the definition of the IKM and found that the Source Technology of was set to Generic SQL.


At a first glance, this seems to make sense because the usability of the IKM should not be limited to a certain database technology like Oracle or SQL Server. However, ODI is very strict about the selected technologies and since I was using a DataStore of technology Oracle, this KM is not available in my interface.

Now there are two things you can do:
  1. Align the Source Technology with what you are using (in my case Oracle)
  2. Set the Source Technology to <Undefined>
While the first option is working, the second one will be the one that is the better choice because it does not restrict the IKM to a certain technology, but would also work if I was using the Memory Engine or SQL Server as a staging area.


This little change resolves this bug - unless you have defined your Data Server of technology Generic SQL because then it would have worked fine in the first place. So after I change this setting, I'm able to select the IKM as expected.


The last thing I wanted to know was why this is just the case in 11.1.1.6. Potentially it could have been related to a change in the underlying logic of how ODI determines the available KMs. Since this would be hard to find out, I decided to start going the easy route and compared the IKM Source Technology between version 11.1.1.6 and 11.1.1.5. As you probably already assumed yourself, the IKM in 11.1.1.5 does not define a Source Technology either.

So what did we learn: if you are using the IKM SQL to Hyperion Planning in ODI 11.1.1.6, you can resolve the issue described above by modify the Source Technology. Another thing that we know now is that Oracle is still working on the Hyperion KMs and might come up with some cool new features for us in the future!

Thursday, March 1, 2012

Setting up ODI Environments

Content: There’s a common misconception on how to set up environments for Oracle Data Integrator (ODI). While this setup doesn’t prevent you from building integration processes, it causes confusion and is the root cause for serious problems arising. This post will tell you what you need to know, so enjoy the benefit of learning from the experience of many ODI implementations and set yourself up for a successful implementation right from the start (or just contact MindStream Analytics and we’ll give you industry-leading value from inception throughout the entire development and operating life cycle).

Since 2008, I’ve been involved in many ODI implementations as Integration Lead and Architect. Thinking back to my first project always puts me a little bit at unease, although I’ve also built some neat processes there. Today I would have definitely done some things a lot different, but then again it was a great learning experience that a lot me to get very familiar with the underlying principles. (Also the client asked me to come back because the intermediary Consulting firm wasn’t able to perform as expected in this complex environment).

Since Oracle designated ODI as the replacement for Hyperion Application Link (HAL), a lot of clients are starting from scratch with their implementations and environments. This is always very nice, like a fresh breeze to an optimistic start, because it is possible to make sure that all the best practices that I’ve developed over time can be implemented. However, one thing is often not optimal: the initial installation and configuration of the environments. I’m not trying to blame the infrastructure consultants, they are doing a great job getting environments up and running, but I think it’s a matter of understanding the specific requirements of ODI which differ from the other Hyperion products. The main point here is that there are significant differences between a development and a production environment. While these pretty much contain the same artifacts throughout all environments for Hyperion Planning and Financial Management (hierarchies, rules, calc scripts etc.), the objects that ODI uses come in different formats.

Typically ODI is being installed in each individual environment, e.g. DEV, TEST, PROD. While the installation can usually be done pretty much in the same way (install ODI Studio, Standalone and/or J2EE agent, ODI Console), there are some differences in configuring the repositories in the different environments. Let’s take a look at the different repository types:
  • Master Repository: specify available Technologies, stores connectivity information (Topology), set up Work Repositories, define Security
  • Work Repository: generally, a Work Repository contains definitions of the processes and the execution logs. There are two types, though:
    • Development Work Repository (DWR): allows creation and modification of integration processes and components; ODI Designer module is only available for this type of Work Repository
    • Execution Work Repository (EWR): only allows execution of Scenarios (executables), all objects are read-only
What I’ve noticed several times was that all environments were set up the same way: one Master Repository and one Development Work Repository in DEV, TEST and PROD. While this actually does work, I would be concerned that it may be the root cause for future inconsistencies. It causes confusion because it allows a developer to create integration processes in other environments than in DEV. While this is often considered a quick and easy way to develop hot fixes and a workaround to handle incorrectly deemed “migration errors” due to hard coded paths and application names, it’s the beginning of serious problems with ODI – by invitation. If someone really understands ODI, there are actually very elegant and efficient ways to deal with every aspect of these concerns (but this is a different discussion).

EnvironmentDevelopment WRExecution WRMaster Repository
DEVXX (optional; DWR is usually sufficient)X
TESTXX
STAGE (if desired)XX
PRODXX

Note: instead of creating one Master Repository per environment, it is also possible to create one centralized Master Repository which can be accessed from all environments (see below).


A Development Work Repository should only exist in DEV: one place to make changes, all other environments will only execute the processes which have been designed in DEV. This principle is the foundation that every software project should follow unless you want to face the risk of running into serious issues with version inconsistencies.

All other environments should only have an Execution Work Repository, to transfer over and execute the Scenarios (“Executables”) which were designed in DEV. ODI supports this principle by restricting the Designer to be only available in a Development Work Repository. Trying to connect via Designer to an Execution Work Repository leads to an error message. This way, Projects, Models etc. can only be accessed in DEV. Access to EWRs is granted via the Operator, the main purpose being monitoring and debugging processes as well as importing the Scenarios which have been created in DEV.


The setup of the Master Repository is different. It is actually possible to leverage one central Master Repository for all environments. All types of WRs can access the same Master Repository. From an architecture standpoint I like this idea because it simplifies the migration process. However, there are some concerns about this. From my experience, most clients are more comfortable with a separate Master in each environment rather than having one central repository. This is particularly the case because it is one way to prevent users to execute a process in the wrong Context.

I do understand this concern, but on the same token would propose designing a Security Concept which handles these access matters. Once this has been set up, there are several advantages over the environment specific Master Repositories, especially in regards to Migration as well as setting up Disaster Recovery environments.

Thursday, June 9, 2011

Access Hyperion Applications on Amazon EC2 from your local computer

In this post you will learn how to access Hyperion Workspace and other Hyperion applications located on an Amazon Cloud server from your local Internet Browser.


Important note: following the below steps at your own risk only. This setup was just a test to play around with the functionality and can cause serious consequences because it exposes your system to potential intruders and other undesired situations. Please consult additional resources to find out about the associated risks and how to mitigate them correctly.

Amazon Web Services (AWS) and its Elastic Compute Cloud (EC2) have found a lot of followers in the Hyperion space. A few of the many benefits are flexibility to start up multiple instances within mere seconds, usage as a service reduces costs, hardware maintenance through Amazon, save snapshots of images to test changes and revert back if needed, and many more.

Development of Hyperion applications on the cloud has gained a lot of trust, especially as it makes it possible to jump start an implementation while the IT department might still be in the purchasing and setup cycle. We've been using this in various situations at MindStream Analytics. A common approach to access servers on the cloud is via Remote Desktop connection, however, by default there is a limitation to only 2 connections at a time. With more than 2 developers or testers, this will obviously cause difficulties. A great way to get around this is to open up the ports for the web components of Hyperion to access applications via the Internet browser on the local computer and thus no need to use a Remote Desktop Connection.

Four configuration steps are required:
1) Create Security Group
2) Open ports for applications to be published
3) Launch instance and assign security group
4) Configure Windows Firewall to open ports


Create Security Group

Security Groups can be maintained on the EC2 tab. They appear underneath the Network & Security section.


Create a Security Group which you will be using for the Hyperion Server.


Open ports for applications to be published

In order to access applications on the Amazon Cloud from a local web browser or other client tool, the relevant ports need to be opened. This can be done as part of a Security Group. Switch to the Inbound tab where you will see the following screen.


As a first step we will grant access to the server for a Remote Desktop connection (RDP). Select "RDP" from the drop-down list, then click on "Add Rule" and "Apply Rule Changes". This will assign the rule to the Security Group and thus opens the RDP port for access from the outside world.


Now add two more rules: HTTP (port 80) and a Custom TCP rule for port 19000 (which is commonly used for Workspace). Our Security Group now looks like this:


Launch instance and assign security group

Now launch your Hyperion image on a new instance and assign the created Security Group during the configuration process of the Request Instance Wizard.


Configure Windows Firewall to open ports

Log on to the server and configure the Windows Firewall to accept connections at the required ports. This can be done via Control Panel > Windows Firewall. Click on Change Settings.


The Windows Firewall Settings window comes up. Switch to the Exceptions tab and click on "Add Port…"


Type in a meaningful name and the port number (protocol is usually TCP):


Verify that the Exception has been added.


This is all that needs to be done from a setup perspective. Go to the Instances screen and click on your running instance. The lower section of your screen lists information to determine the IP address through which the server is available.


In the example you can see above, the server can be reached via IP address 50.19.52.101. If Hyperion Workspace is listening at port 19000, you can access it from any browser at http://50.19.52.101:19000/workspace/index.jsp .

Note: the instance I started up for this blog post has been shutdown again. Therefore, the above URL will not work (unless someone else is using the exact same server instance with the same address, has Hyperion running and opened the ports). Be aware that a setup like this has advantages and disadvantages. Especially if you are dealing with sensitive information on the cloud server, you should find out about the risks of using publicly available servers.

Feel free to contact us at MindStream Analytics to help you answer specific questions about your needs around Hyperion on the Cloud

Wednesday, April 27, 2011

Adding Enhancements to FDM

Oracle Forums is a great place to share thoughts on Oracle products and to get help with difficult problems. The other day, a question was posted on how Hyperion Financial Data Quality Management (FDM) can be customized to ask a user for input and then further process the data. This particular thread is about adding email addresses for certain users whose information cannot be retrieved from Active Directory and therefore needs to be entered manually. Due to the large user base in this company, it was desired to create an automated solution.

This reminded me of a solution I created previously which could handle this type of request. This post will outline the steps to customize this solution and how it would be possible to tweak FDM to support the input process.

Important note: the following content shows an example of a process, there's no guarantee that this will work in your environment and if you decide to do any of this, it will be at your own risk. Tasks performed to manipulate the content of the FDM database should only be performed from consultants or developers who have a very thorough understanding of FDM and its database. Changing content in the tables can cause severe system failures and recovery will most likely not be supported through Oracle.

FDM by itself is not able to retrieve user input through a form. With a little trick, it is possible to create forms which will take input information, however, the entered information cannot be passed back into FDM without significant effort. This is where MindStream's FDM Enhancement Utility comes into play. It is a web application which can be configured to wait on certain requests and then execute tasks. This will get a little bit technical, you will need to refresh your HTML knowledge a little bit, but here's a blue print of how this can be done.

As a first step, let's see how we can create a form in FDM. We need to create a script which will open a pop-up window and add content to a HTML form which requests the user to enter his/her email address.

The script can look like this:


(it's a little tricky to embed this into the HTML code that FDM produces for the pop-up window, in order to understand the opening and closing of the pre and form tags you will need to take a look at the HTML source code)

When you run this script from the Script Editor (it only works from the WebClient), the following window will appear:


You can launch this form from a FDM Task Flow or by adding it to an event script which will prompt the user e.g. when launching the Import process. You will probably want to put in a test to check if the user already entered an email address.

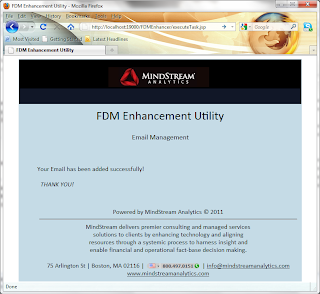
After entering the email address, the user can now click the "Sign Up" button. Now take a look at the script again. The form action will pass the entered parameters to the FDMEnhancer web application and launches the executeTask.jsp. In the background the email address will be added to the FDM database and the successful entry will be acknowledged.


Wow, that was easy - but how does this work? Obviously there's quite a bit going on in the background. The FDM Enhancement Utility is a web application which can be configured to perform certain tasks. In our case, a task has been created to write the email address back to the FDM database. I will show you what's going on behind the scenes.

First, an administrator would launch the web application and enter logon credentials.


The first screen shows an overview of commands: Administration brings you to the screen where you configure access to the FDM repository, the Tasks contain the different enhancements which have been defined and that can be launched from one of those custom web forms in FDM.


What we want to do now is create a new task that can handle the email address collection process.


Here's what the entries related to (keep in mind that this is a web application which is based on Java. There is obviously a program in the background which takes these input parameters and then executes the process):
- Task name: this description will show up on the overview screen
- Action name: this is the parameter that will be passed to FDMEnhancer in order to trigger the correct process
- Parameters: 'username' and 'email' are the input parameters to the email function, additional parameters can be added
- Command Type: select SQL or Batch script etc.
- Command: this is what will be executed (parameters will be replaced at run-time)


This should give you a little insight into what MindStream's FDM Enhancement Utility can do. Thanks to FDM's extremely valuable API, things like this can be embedded smoothly into a process. Feel free to post a question or a comment to get in touch.

Thursday, April 7, 2011

Purpose and Benefits of Drill-into-Anything (DIA)


What’s in it for you to read this? In this blog you will learn what inspired us at MindStream Analytics to create this brand new source adapter for FDM. I will also show you a couple use case and as we are going along with them you will understand the benefits that Drill-into-Anything can offer to your organization. On March 10, I went to the Central States OAUG conference in St. Louis for a presentation about this topic. You can download the slide deck here (link)
A quite common scenario during the Financial Close processThe following example describes a scenario which is very common during the Financial Close (link to FCM) process. We are assuming that the latest GL and statistical information will be supplied in form of a flat file which IT extracts twice daily from the General Ledger system. The data will then be imported by a financial analyst into Hyperion Financial Data Quality Management (link), mappings are being validated and the data will finally be loaded to Hyperion Financial Management (link) and consolidated. A few Financial Reports (link) are available via Hyperion Workspace (link) so the data can be reviewed by the responsible manager.
… will it ruin your day?Today is the last day of the Close Process, the quarterly reports are due to be released tomorrow. Everything went well and you are ready to leave and meet with your best friend who invited you to go to this great event you’ve been really looking forward to for a while. You’re just about to put your monitor to sleep when the phone rings. You find out that a regional manager is questioning the correctness of one of the reports. [What you are thinking right now is bleeped out in this blog.]
There’s something wrong – can you find it out? There is one number in the system that is incorrect, Accounts Receivable are missing $20K. This is “an extremely important transaction” (and the intensity of the manager’s voice underlines this – probably it’s related to a bonus paid if the results were $20K higher, but the transaction doesn’t even exist). Well, it’s kinda YOUR job to make sure the reports are 100% correct, so you better get started. MindStream’s Drill-into-Anything (DIA) Adapter extends the Drill-Through for Hyperion Systems all the way in the source system(s) – any source system. The systems are completely integrated.
Of course you can…You know how you can find it out: you ask for the exact intersection where the incorrect number was found and then you drill back with the manager, maybe get another analyst or accountant involved. Then you drill to the lowest level in the Financial Report and back into FDM. In there, you first review the maps of the transaction in question and if they are correct go further down to the source data which was imported.
…but how long will it take? The details within Hyperion are not sufficient to find the root cause for the discrepancy, so you will need to go back into the ledger system. The Accountant you asked for help has access to the source system, but unfortunately this exact system is the one which requires several transformation to get the source data into the format that is needed to load it to Hyperion (at least based on the process that your consultants implemented in the very last minute). Great, so you will even have to go through some spaghetti-like mappings logic. After collaborating with the whole team and even getting a helpful software developer involved, you are able to decipher the SQL code that leads to the intersections in the source system and you can log on and review the actual transactions which the incorrect number was comprised of. You are just a few clicks away from discovering the root cause of this discrepancy
Good news: the cause has been identified Looking at the transactions, the manager notices right away that reversing entries for 2 transactions of $6,400 and $13,600 have been entered. The intern must have misunderstood the directive! The accountant removes the entries. Now the data from the GL system can be reprocessed. Yes, you found this out with DIA – within a couple minutes
But how do we reprocess the data if we can’t wait until tomorrow As the data from the source system is being transferred to FDM via a flat file, we need to get IT involved – but they all went home already. The Service Level Agreement gives the on-call support rep 2 hours. Waiting around now, call your friend to cancel, maybe you can join the event for the last 10 minutes or so. Besides drill through, DIA also enables you to pull real-time data from your source system into FDM. Click 1 button instead of waiting on a new file.

Wednesday, February 23, 2011

There is a need for a new solution: Drill-into-Anything

If you are interested in Drill back from Hyperion Financial Data Quality Management into any of your source systems, then you are at the right place to find out more about a ground-breaking solution called "Drill-into-Anything. MindStream Analytics has developed this solution to help analysts expedite tedious analysis and reconciliation processes.

Last year I was working as a sub-contractor at a very successful high-tech company in San Francisco and learned about a problem which will apply to many other companies as well. This was not a project of MindStream Analytics, but the consulting firm on-site asked me to take over as the data integration specialist for the last two months of an upgrade project from pre-system 9 to 11. While I was facing a lot of work on my side, compared to the short time frame to complete (converting HAL routines to ODI processes and building additional ODI and EPMA automation processes), the project's major risk was in a different area.

The original architecture included Hyperion Planning and Financial Management (HFM) as the target EPM applications which would be the source for various management reports. Financial Data Quality Management (FDM) was going to be the application which would take care of loading and mapping the data from E-Business Suite into Planning and HFM while also enabling drill-back from into the General Ledger system - utilizing the new ERP Integrator (ERPI) adapter for FDM.

I was very familiar with ERPI after leading an implementation with this brand new EPM component in a previous project. The solution sounded state-of-the-art and very promising to help the company improve their performance management processes. However, something was not right here: nobody was talking about FDM and ERPI anymore but drill-through was mentioned many times as a problem area.

Drill-Through not supported with ERPI and E-Business Suite version prior to 11.5.10 cu2

As I found out, the project had required a significant change in scope as the original design was not feasible due to one incompatibility. The version of existing E-Business Suite (EBS) implementation was one sub-release below the required version which is supported by ERP Integrator (11.5.9 instead of 11.5.10). Because of this, FDM - as the enabling solution for the highly desired drill-back - was replaced with Essbase Studio. ODI was supposed to populate the tables to feed Studio's drill-through and in parallel integration processes loaded data to HFM and Planning. As drill-back from Planning and HFM was not possible without FDM, a separate Essbase application was created - the Studio application. This way drill-through to EBS data was possible, although the data was maintained in a separate database.

While it becomes obvious that this solution was not as smooth as one expected (multiple load routines, drill-back is not directly possible from HFM and Planning), it seemed possible. However, the data validation effort to make sure that the Reporting cube would exactly match the consolidated data in HFM did not succeed within time and budget.

Projects aren't always successful, but if this case have happened today, I am sure the outcome could have been changed. The reason I am so confident about this is because of a solution named "Drill-into-Anything" which was created by MindStream Analytics. Drill-into-Anything (DIA) is a source adapter which can be used as an enhancement to FDM. It is quite similar to ERP Integrator, however, it has one major benefit: it is not limited to certain versions of GL systems as the data source.

DIA offers drill-through into any source system, any version.

With Drill-into-Anything, it would have been possible to leave the original architecture at this client as it was and only ERPI would have to be replaced by DIA. The need for an additional Reporting cube - and the associated effort of synchronizing the data between this Essbase application and Planning and HFM - would have been eliminated.

If your company is facing a similar situation, please feel free to contact us.